> For the complete documentation index, see [llms.txt](https://help.flowerbuddy.co/llms.txt). Markdown versions of documentation pages are available by appending `.md` to page URLs; this page is available as [Markdown](https://help.flowerbuddy.co/reference/event-page/details/build-event-flower-palette.md).
# Build the Event Flowers palette
**Event Flowers** is the flower palette for the event. It gives you a starting selection to use across the designs. It is separate from the flowers and quantities inside an individual recipe.
For example, a palette can contain white garden roses, blue delphinium, and Italian ruscus. A centerpiece recipe still needs its own quantities for the flowers it uses.
## Add flowers to the palette
1. Open the event and select **Details**.
2. Expand **Event Flowers**.
3. Select **Add Event Flower**. If the palette already contains flowers, select the pencil icon first.
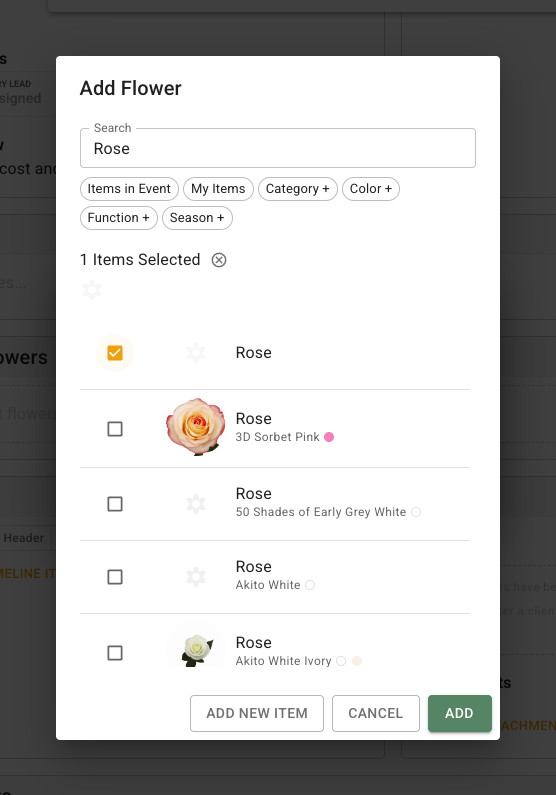
4. Choose one or more flowers.
5. Select **Add**.
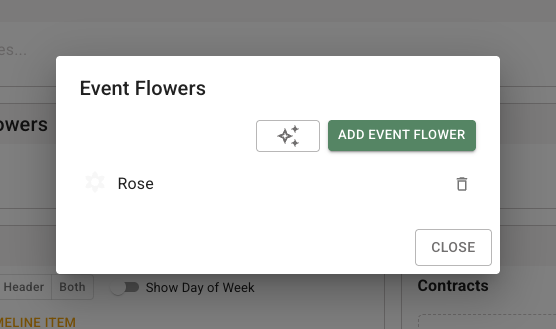
6. Close the **Event Flowers** dialog when the palette is complete.
The selector uses flower records from Core Data and leaves out flowers already in this palette. The saved palette shows the selected flower images or initials.
Search by flower name and select the flowers you want to add. The selected count helps you check the selection before choosing **Add**.
The **Event Flowers** editor keeps the palette together. Use **Add Event Flower** for more flowers or the trash icon beside a flower to remove it from this palette.
To remove a flower, open the **Event Flowers** editor and select the trash icon on that flower's row. Removing it from the palette does not delete the flower from Core Data or automatically remove it from recipes that already use it.
## Start a palette with FlowerBuddy AI
The AI palette tool can suggest a first draft for you to review.
1. Open the **Event Flowers** editor.
2. Select the AI control with the **Generate a flower palette using FlowerBuddy AI** tooltip.
3. Describe the event and the flower direction you want.
4. Select **Generate**.
5. Review the suggested flowers. Remove unsuitable choices or select **Add Flowers** to add a specific flower yourself.
6. Enter feedback and select **Refine** when you want another draft.
7. Select **Save** only when the draft should become the event palette.
If the event already has a palette, saving the AI draft replaces the current Event Flowers list with the draft shown in the dialog. Review the full list before saving.
AI-generated Event Flowers do not automatically update every recipe. AI recipe generation and AI image generation are separate tools with different results.
The AI control appears only when your workspace has access to the feature and enough AI credits. Manual palette editing does not require AI.